Setting up Kong API Gateway - Part 2/2
Managing Kong using UI#
Konga is an unofficial project which is basically an UI for Admin API of Kong. This post is about how to setup Konga and configuring an upstream service. We will also add an authentication layer to our upstream.
Docker to the rescue#
We will use Docker to quickly setup Konga as it a Node.js project and it is a lot of trouble building node projects on server, so let’s just use Docker.
Our docker-compose.yml for reference:
version: "3.1"

services:
  db:
    image: postgres
    restart: always
    ports:
      - 5432:5432
    environment:
      POSTGRES_PASSWORD: "<redacted>"
    volumes:
      - /home/ubuntu/docker/volumes/postgresql/:/var/lib/postgresql/data
    networks:
      - dockergalaxy

  app:
    image: pantsel/konga:latest
    restart: always
    ports:
      - 1337:1337
    environment:
      DB_URI: "postgresql://user_redacted:pass_redacted@db:5432/db_redacted"
      DB_ADAPTER: "postgres"
    networks:
      - dockergalaxy

  nginx:
    image: nginx:latest
    ports:
      - 80:80
      - 443:443
    volumes:
      - /home/ubuntu/docker/volumes/nginx/conf/:/etc/nginx/conf.d
      - /home/ubuntu/docker/volumes/nginx/ssl/:/etc/ssl/certs/konga/
    networks:
      - dockergalaxy

networks:
  dockergalaxy:
docker-compose pull
docker-compose up -dVerify, if all 3 containers are up.
$ docker ps
CONTAINER ID        IMAGE                  COMMAND                  CREATED             STATUS              PORTS                                      NAMES
5f20abcd81fc        nginx:latest           "nginx -g 'daemon of…"   29 hours ago        Up 28 hours         0.0.0.0:80->80/tcp, 0.0.0.0:443->443/tcp   deployment_nginx_1
ff20abcd24a66        pantsel/konga:latest   "/app/start.sh"          30 hours ago        Up 29 hours         0.0.0.0:1337->1337/tcp                     deployment_app_1
5848abcd27d2a        postgres               "docker-entrypoint.s…"   30 hours ago        Up 29 hours         0.0.0.0:5432->5432/tcp                     deployment_db_1
Konga is running on port 1337 and you can verify the same by doing a curl:
curl http://localhost:1337 # should return HTTP 200Adding an Upstream to Kong#
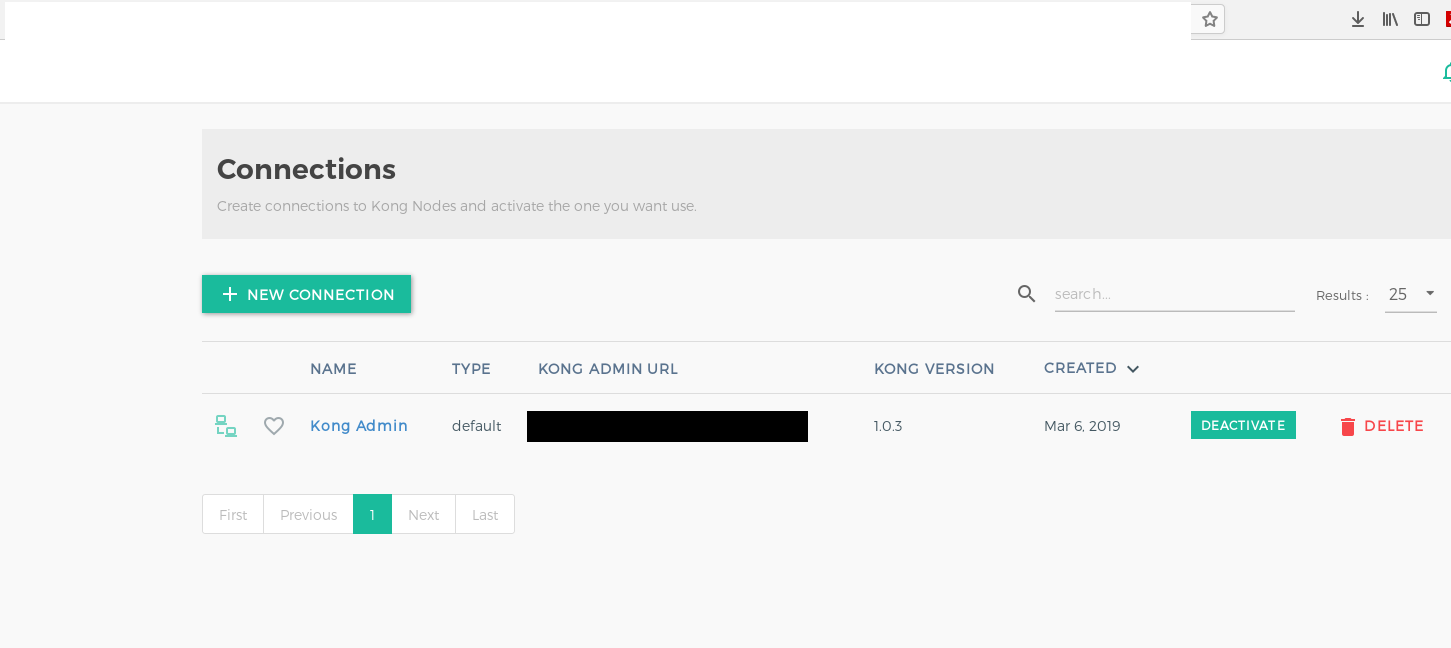
Visit Konga Admin Dashboard to login. If this is a first time login, you need to activate the connection to Kong’s Admin API by visiting Connections tab. This step needs to be done by each admin user, individually.
Some common terminology before we begin setting up our APIs: (Source)
| Term | Description |
|---|---|
client | Refers to the downstream client making requests to Kong’s proxy port. |
upstream service | Refers to your own API/service sitting behind Kong, to which client requests are forwarded. |
Service | Service are abstraction of each of your own upstream services. |
Route | Routes are entrypoints into Kong, and defining rules for a request to be matched, and routed to a given Service. |
Plugin | This refers to Kong “plugins”, which are pieces of business logic that run in the proxying lifecycle. Plugins can be configured for an individual route, or a service or globally. An example of plugin which we use is Key Auth plugin for authentication. |
Adding New Service#
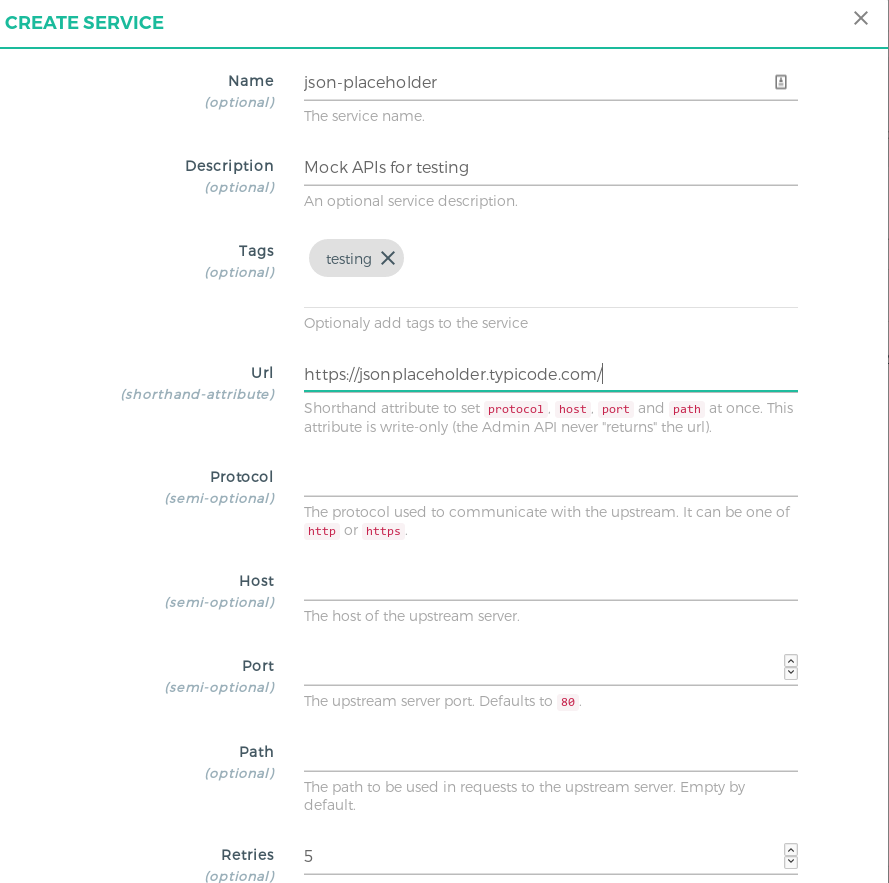
Visit the Services section and click on Add new Service. Enter the following details for your upstream service here. You can refer to the below screenshot for reference:
| Field | Value |
|---|---|
Name | Add a unique name for your upstream service. |
Description | Service description. |
Tags | List of tags to identify a group of services together. Press ENTER for any kind of array values in Konga UI. |
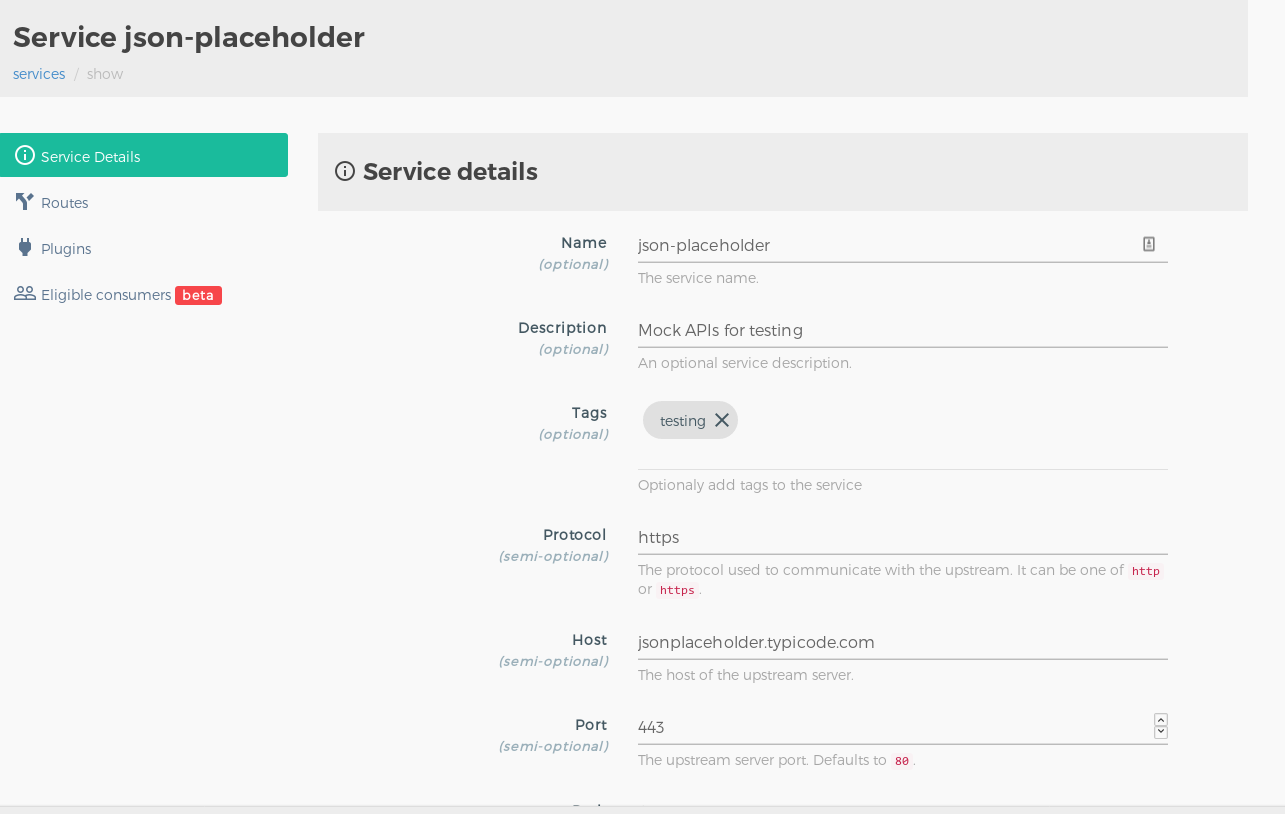
URL | Shorthand for setting Host, Path, Protocol with just one value. Note that this is only a feature in Konga, Kong doesn’t have it, when using it with the Admin API calls directly. |
Verify the details once and click on Save. Next, we’ll see how to add routes.
Adding Routes to Services#
Visit the Services section and click on the service entity you just created.
Go to the routes section and add the a new route entry for the service. You can refer to the below screenshot for reference:

| Field | Value |
|---|---|
Name | Add a unique name for your route. |
Hosts | Kong checks for the hostname present in the incoming request’s header. If you specify this value then the Hostname must be present for Kong to match the request to this route. This is suitable only if you want to block any request made outside this hostname. You can leave it null if not needed. |
Path | List of paths present in incoming request. This is required to namespace the upstream endpoints. The client must send this prefix in the request, Kong will try to match any request’s path in this list of paths and based on the settint of strip_path the request will be proxied. |
Strip Path | Boolean value, which configures Kong to strip the matching path from the incoming request to the upstream URL. |
How routing actually works#
Kong has the ability to configure really complex routing endpoints based on your usecases. For the simplicity and keeping this guide as generic, the basic (but most common) use case is discussed below by taking an example.
Let’s say your upstream URL(service) is http://jsonplaceholder.typicode.com/. To setup Kong for this service, we will simply add a route, with the path as /fake. Here the path acts as a namespace, to differentiate between different services. This can be helpful to avoid route collision if there are a lot of upstream services configured.
Consider the upstream API endpoint is https://jsonplaceholder.typicode.com/todos/.
If we specify Kong to have the path as /fake and set the strip_path as True then our incoming request should look like
https://kongapigateway.com/fake/todos.
Kong will try to match the path /fake in this incoming request and look for the routes where the path is /fake. Since it found the correct route, and we have set strip_path to True, Kong will just remove this particular path prefix while reverse proxying to the upstream URL. In this way, our upstream doesn’t need to be concerned about the path prefix as well.
Adding Consumers#
-
Step 1: Visit the Consumers section to add consumers for your API. Here the consumers doesn’t really mean 1:1 users, it could be a particular production service wanting to consume another service’s API.
-
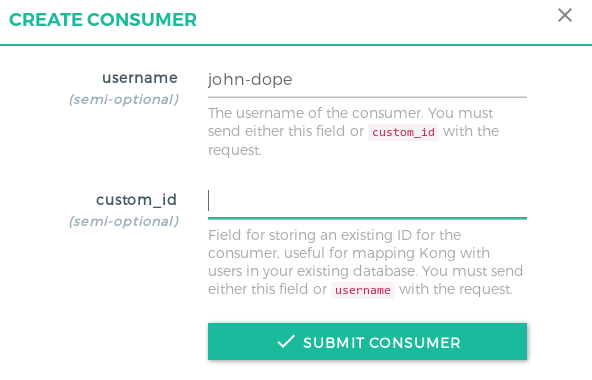
Step 2: Click on Add new consumer and enter the following details:
- Step 3:
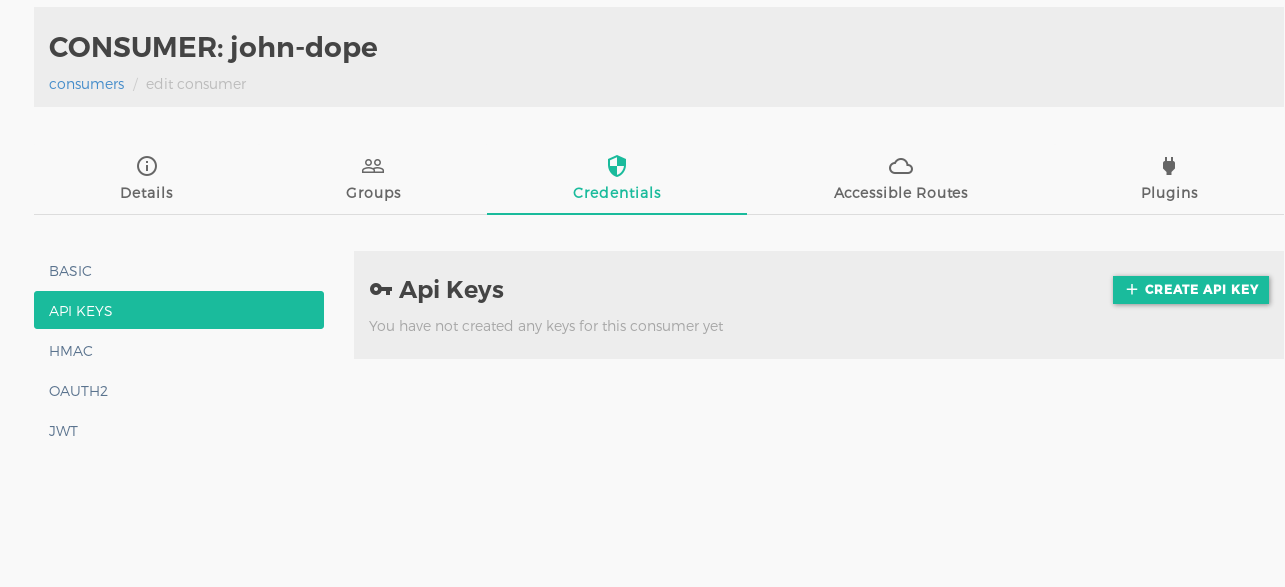
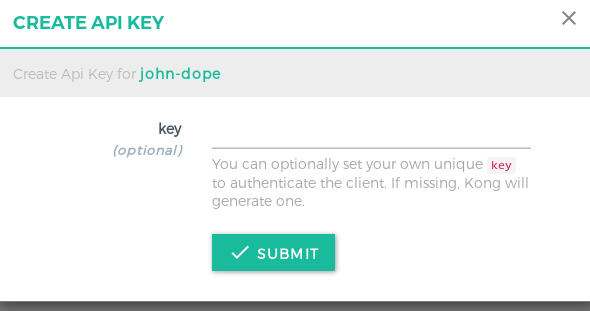
Add the remaining details in the groups section. Visit the Credentials sections, click on
API Keys(since we are using Key Auth plugin for authentication) and simply click on Submit button, since Kong will auto generate the API key for you (which most likely will be more secure than any random key you will enter).
- Step 4:
Leave the other details as it is. We will add this consumer to our Services page. Visit the services tab, click on the service entity you created and
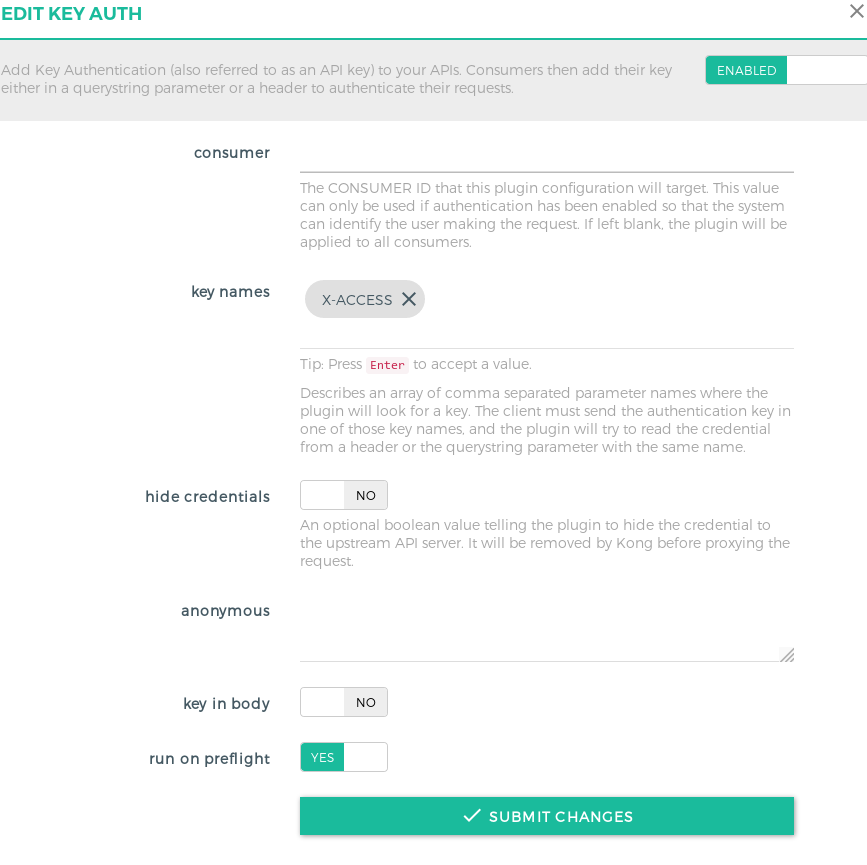
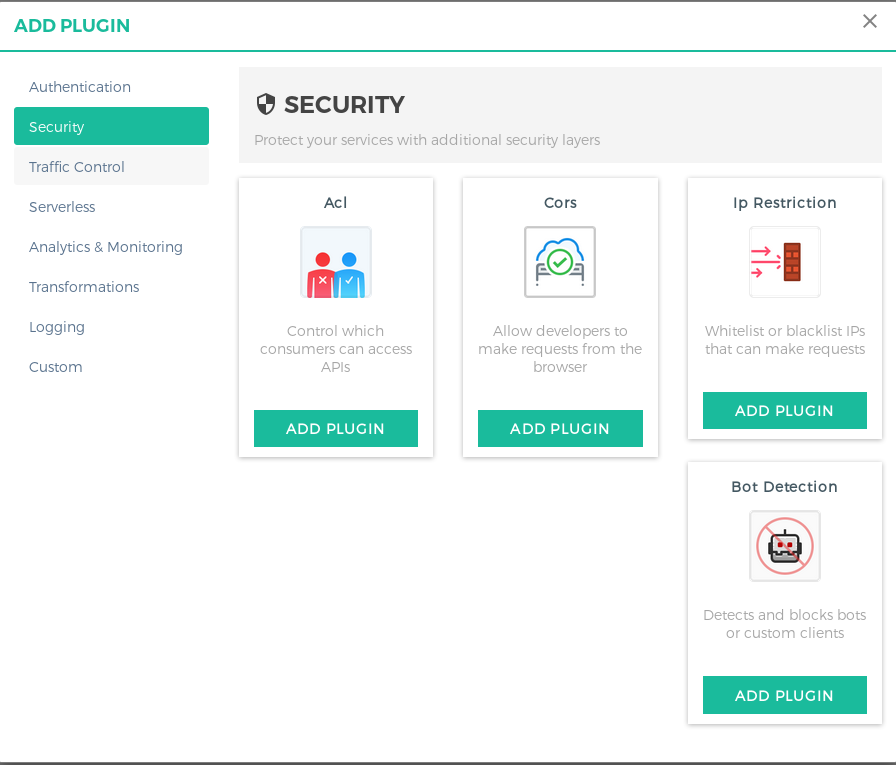
go to Plugins section. Click on Add New Plugin and the select Key Auth from the list.

In the modal that opens up, you need to specify the consumer UUID which was created (or leave it as blank for all consumers to access). More on controlling the access, is present later in the next section.
- Step 5: This feels a bit out of the flow, but after checking out Kong docs, there’s no alternate for this. In the previous step you would have been wondering, what if you need multiple consumers for the service, and want to identify them individually. Since Kong requires you to give either the Consumer UUID or leave it blank so all consumers are tied, the way around this is to use another plugin, called ACL Plugin. With this plugin, you can whitelist a group of consumers, so only the whitelisted consumers can access the API even though you specified All Consumers in the Key Auth plugin. ACL Plugin must be used in conjuction with another authentication plugin.
You can refer to the below screenshot for reference:
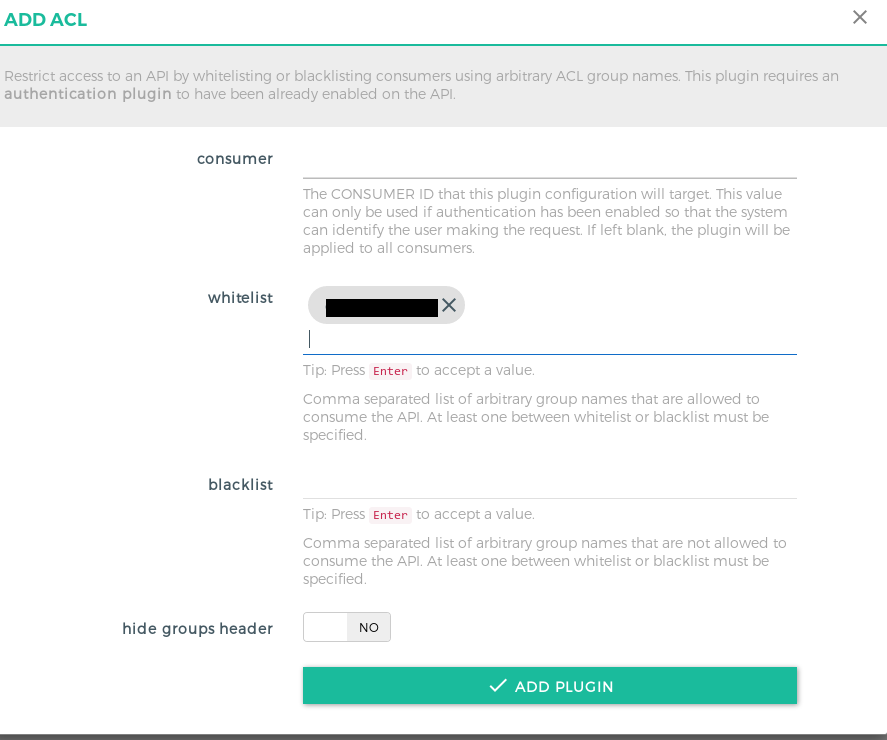
NOTE: This is the same group, which you created at the time of Consumer creation. You can group different consumers based on the service they consume, hence the naming convention one can follow is
You can see all the eligible consumers for the service, in Eligible Consumers tab.
Using Kong as an end user#
You need to replace your upstream API endpoints and all other custom authentication with just the Kong’s URL, the namespace for the service, and add the authentication keys in header while sending the request.
For example:
If your original request is:
curl -i -X GET --url http://jsonplaceholder.typicode.com/todos/The modified request becomes:
curl -i -X GET --url https://kongapigateway.com/fake/todos/ --header "X-ACCESS: ENTER_KEY_HERE"Accessing user authentication details in your API#
You can remove all custom authentication method in your API services as Kong forwards the user information in the headers. You can use the following headers while processing the incoming request to identify the users and implement custom business logic:
| Header Key | Value |
|---|---|
X-Consumer-ID | ID of the Consumer on Kong |
X-Consumer-Custom-ID | custom_id of the Consumer (if set) |
X-Consumer-Username | username of the Consumer (if set) |
X-Anonymous-Consumer | will be set to true when authentication failed, and the ‘anonymous’ consumer was set instead. |
X-Credential-Username | the username of the Credential (only if the consumer is not the ‘anonymous’ consumer) |
The End#
Hope you liked the two part series of setting up and managing your Kong cluster. Do reach out to me @mrkaran_ in case of any feedback for the post. Thanks!