Setting up a RIPE Atlas Probe
Twitter is an amazing thing! For all the shitposting and meme-ing that’s done there, there are some really cool people you get to interact with which wouldn’t have been possible IRL. I happened to stumble upon Swapneel last year in Bangalore at a meetup. He occasionally posts about RIPE Atlas Probes measurements on his Twitter feed and that made me curious and learn more about the Atlas Probe. Call it the Baader-Meinhof effect but just when I was reading his blog post on RIPE Atlas, I found about a Hasgeek workshop which is being conducted by Swapneel himself and well, that’s how I basically got interested in setting up a probe myself.
What is RIPE Atlas Probe#
A Probe is a device used to measure various metrics like DNS, SSL/TLS, NTP, ping, traceroute etc for an upstream target. A network of such probes is useful not just to internet researchers, network engineers, ISP operators, public activists but also to common folks like me who are simply curious about the network/WWW in general. The idea behind this is simple – you get some virtual credits for hosting a probe. You can make use of these credits to run your own measurements to gain insights about the health of your network. The data from these measurements are made publicly available by RIPE NCC and anyone can see these results.
There are 2 ways to host a Probe: Software and Hardware. Since the start of this year, RIPE Atlas is available as software packages for various platforms. Before this, the only way to set up a Probe was to host a Hardware probe by applying for one at RIPE NCC website. These hardware probes are not shipping to India since quite some time as Swapneel mentioned and if you’re in India, your only choice, for now, is to set up a software probe. A few key differences in the 2 kinds of probes:
- Initial Setup: Hardware probe is a plug-n-play device, no setup required. That makes it attractive for a lot of people, to just get a small device and host it.
- Spare Compute: For hosting a probe it is recommended that the probe stays online for as long as possible. This means you need to have a spare compute lying around, like a RaspebrryPi, a VM, a server etc. It’s not really recommended to host a probe on your laptop/desktop - something which has ad-hoc usage pattern. For people who don’t have any spare compute, a hardware probe is more suited for them.
- Tampering Result: With the software probe, there are easy ways of tampering the measurement result, which might give a bad data point to people running the measurements. For eg, a software probe could tamper with the DNS queries for a particular upstream and fool you to believe that there’s a problem with the uplink or the upstream target.
You can read more about Probes here and this FAQ section is highly recommended to clear all the basic doubts you might have about Probes.
Setting up a Software Probe in a Container#
Well, Containers are awesome! It’s easier to do a docker run than figure out the installation instructions for your OS, ensure dependencies are installed and insert 10 other things you have to do. So, I decided to use jamesits/ripe-atlas Docker image to host a probe on my RPi 4.
However, in case you don’t want to use Containers for a reason best known to you, you can visit the official docs and find out instructions for your platform.
You can follow the below steps to set up a probe via Docker:
1. Create a RIPE NCC Account#
You need to register for a RIPE NCC Access Account before proceeding further. Visit the registration page and create an account.
2. Start the container#
docker run --detach --restart=always --log-opt max-size=10m \
        --cap-add=SYS_ADMIN --cap-add=NET_RAW --cap-add=CHOWN \
        --mount type=tmpfs,destination=/var/atlasdata,tmpfs-size=64M \
        -v /var/atlas-probe/etc:/var/atlas-probe/etc \
        -v /var/atlas-probe/status:/var/atlas-probe/status \
        -e RXTXRPT=yes \
        --name ripe-atlas --hostname "$(hostname --fqdn)" \
jamesits/ripe-atlas:latestNOTE: In the above case, since I am running the Probe on my RPi which is why I am using latest-armv7l tag for the jamesits/ripe-atlas image. In case you are doing this on an amd64 machine, you should use the latest tag only. You can find more options for the container here.
3. Apply for a Software Probe#
You need to register for a software probe here and fill in the details as mentioned below.
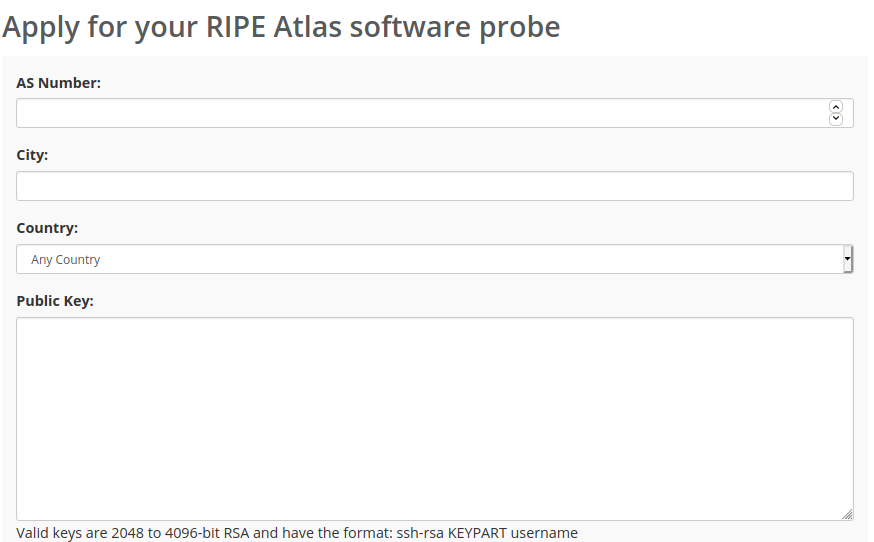
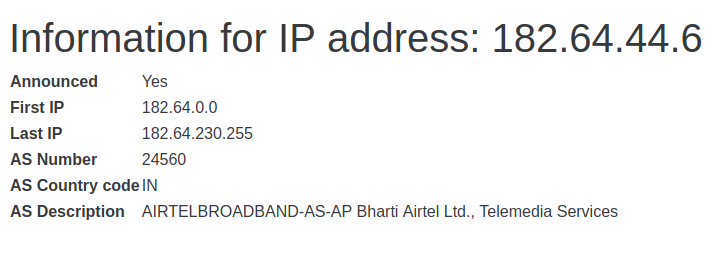
- ASN: You can find the ASN of your public IP by visiting ip2asn.com. You need to enter your public IP here which you can find it by visiting ifconfig.co.
- Public Key: You need to fill the public key generated by your Probe:
cat /var/atlas-probe/etc/probe_key.pubNote: We are mounting the /var/atlas-probe/etc on the host path inside the container at /var/atlas-probe/etc. This ensures that if you stop/remove the container, your public/private key pair isn’t lost and there’s no need to regenerate/apply for a Probe again. However in case you lose this, the Probe will attempt to generate a new pair and you might need to change the public key at that point of time. So be careful to take a backup of the generated key and store somewhere safe.
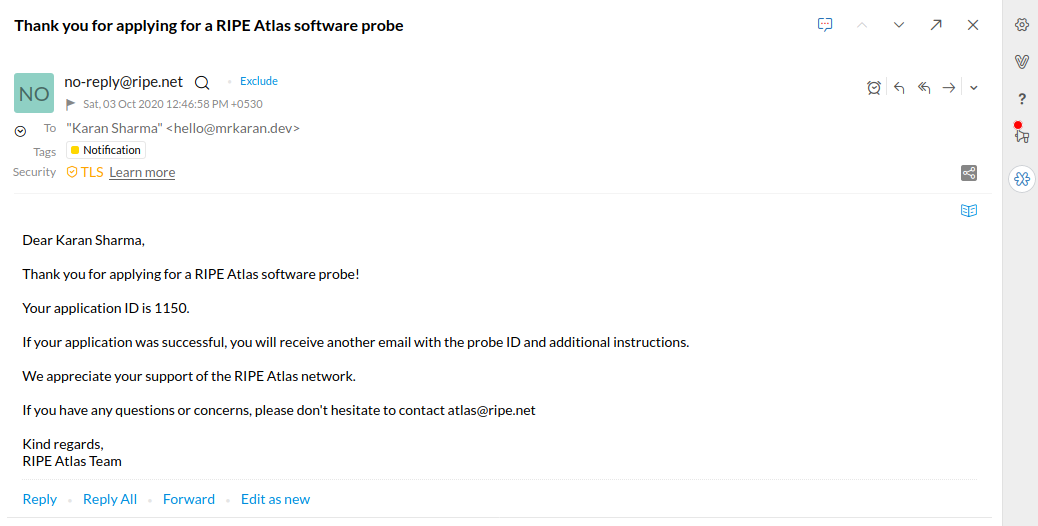
After submitting the form, you will receive an email which will have information about your Probe ID.
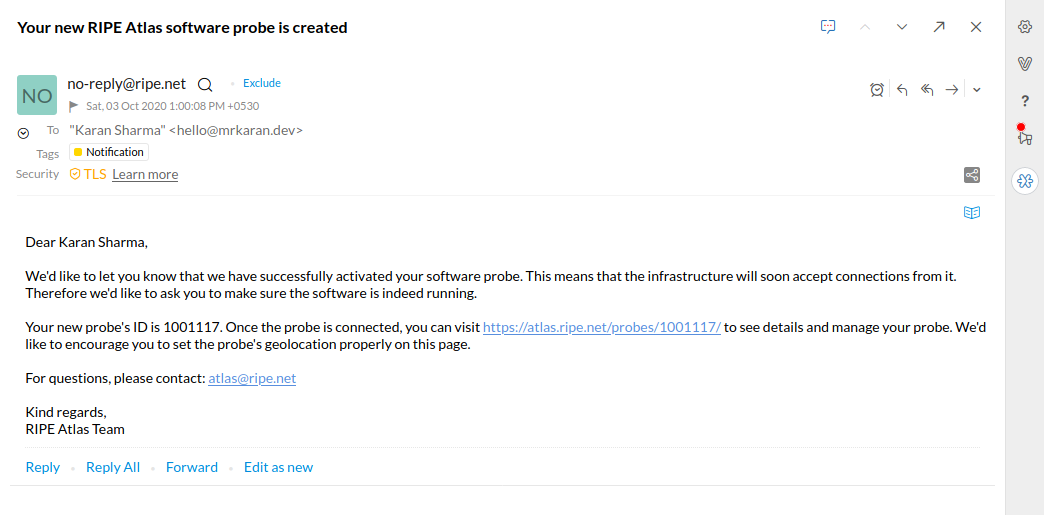
4. Wait patiently#
After filling the form you need to wait roughly for 15 minutes for your probe to be added to the global network of Atlas Probes. You will receive an email saying your Probe is live now.
Creating Measurements#
It’s pretty simple to create measurements, both via UI and a Python library developed by the RIPE community. However, for the ease and convenience I will demonstrate how to create a traceroute measurement from the UI itself:
Note: You get around 15 Credits/minute for hosting a probe. In case you just deployed a probe you might not have enough credits to perform this measurement. You can come back later to do this when you have sufficient credits.
Visit the dashboard and headover to Measurement tab. On clicking the Create a Measurement button you will be presented a form with various options. Let’s try a Traceroute to mrkaran.dev for this measurement:
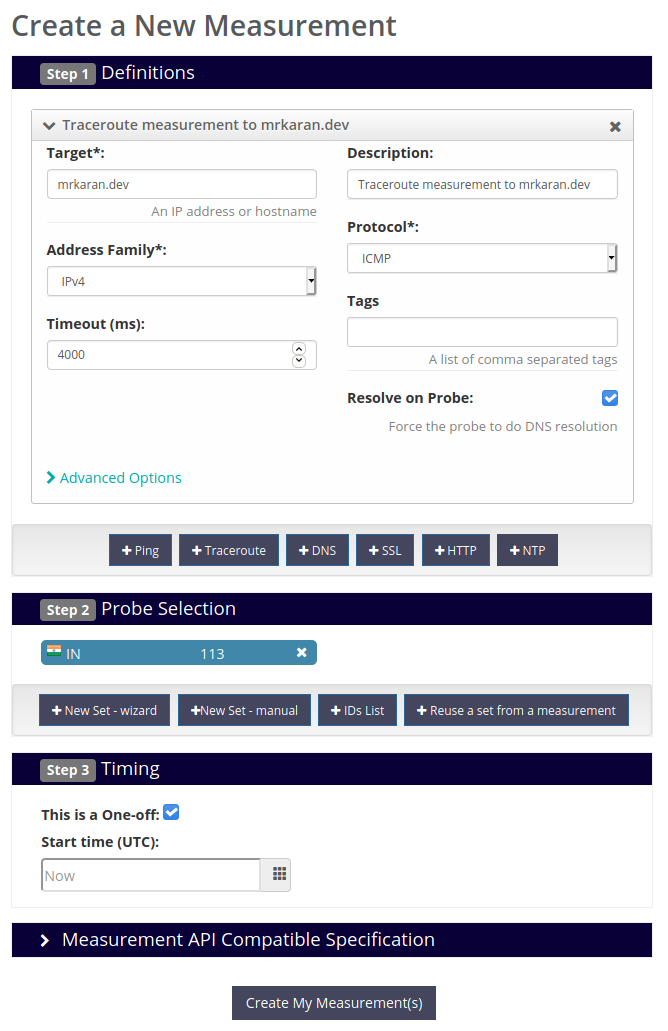
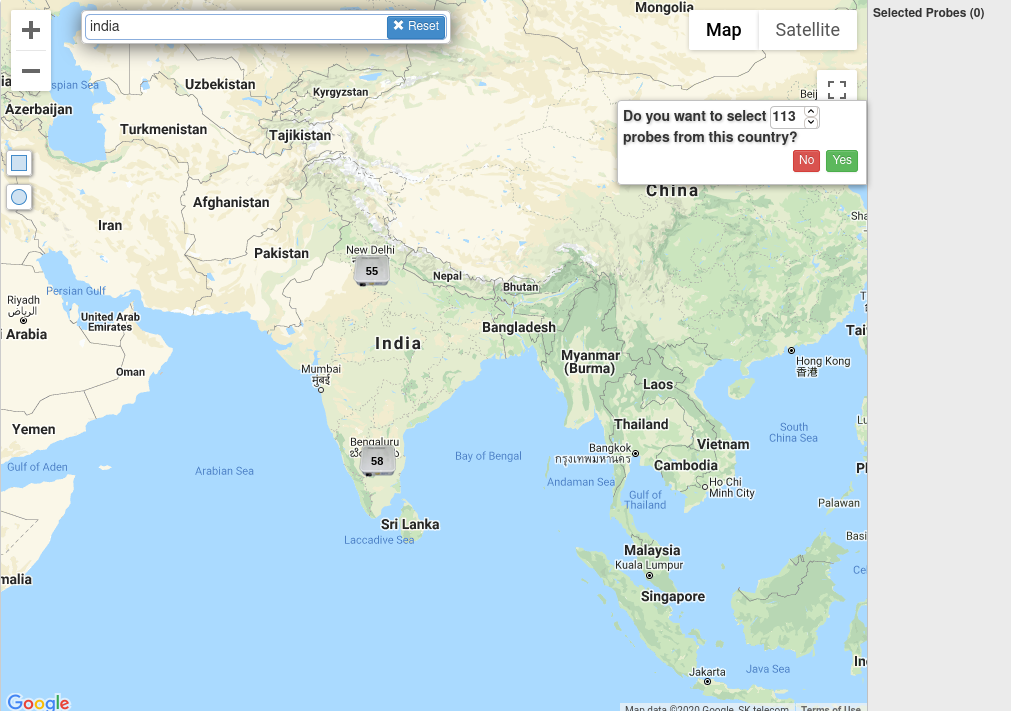
To limit the number of probes, I am going to select all Probes in India, by clicking on +New Set -wizard option in the Probe Selection tab.
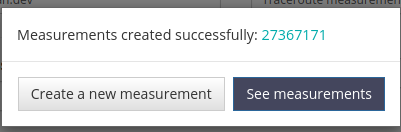
After submitting the form, you will be presented with a Measurement ID which you can use to download the data at a later point as well.
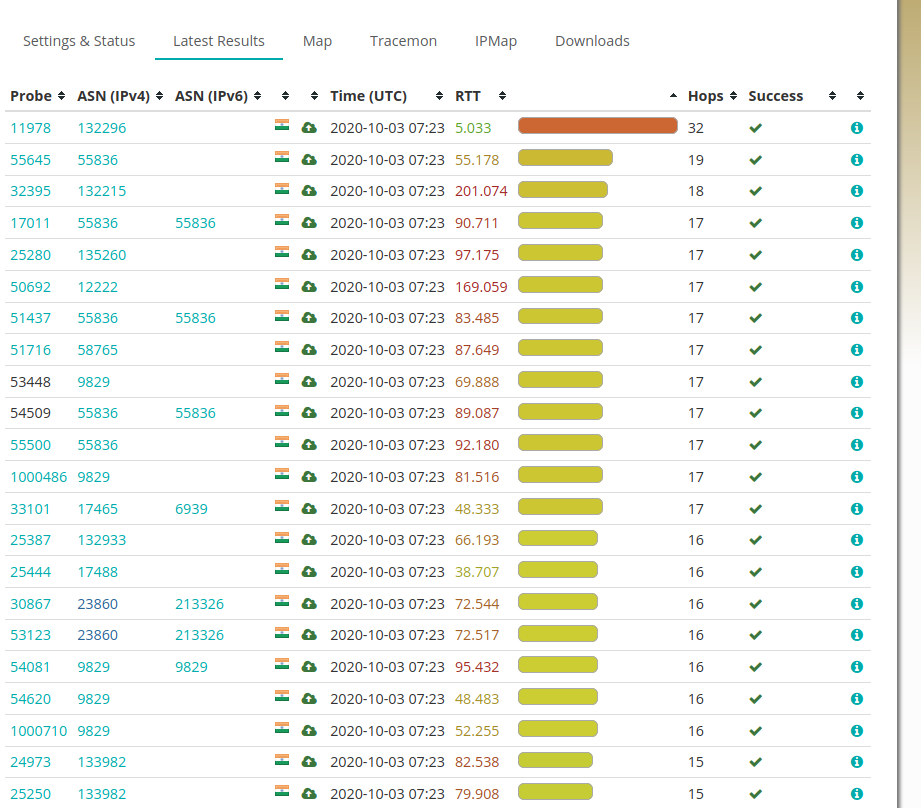
Visit the Measurement ID page and wait for a couple of minutes for all probes to perform the measurements:
That’s it! You can explore other types of Measurements and different options while performing them to customise your use case.
Summary#
Atlas Probes are pretty easy to host and they are crucial in giving valuable insights about how different clients connect to upstreams and spot issues in Networks. If you can host a probe, you should seriously consider doing that and help increase the number of probes in the network. As of today, the number of probes in India is just around 113 and that is seriously very less.
If you need any help hosting one, don’t hesitate to contact me on my Twitter.
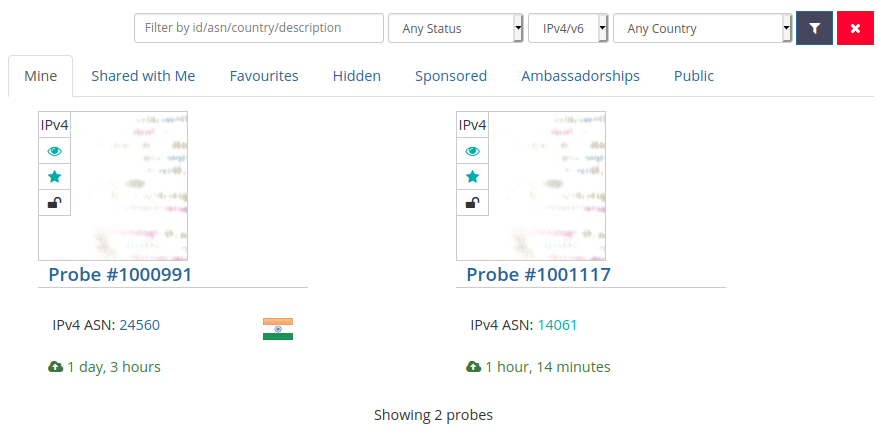
Oh, and for the record, I am hosting 2 Probes currently. Probe 1000991 hosted on my local RPi connected to my home network (ASN24560) and Probe 1001117 hosted on a DigitalOcean droplet in Bengaluru (ASN14061).
Fin!