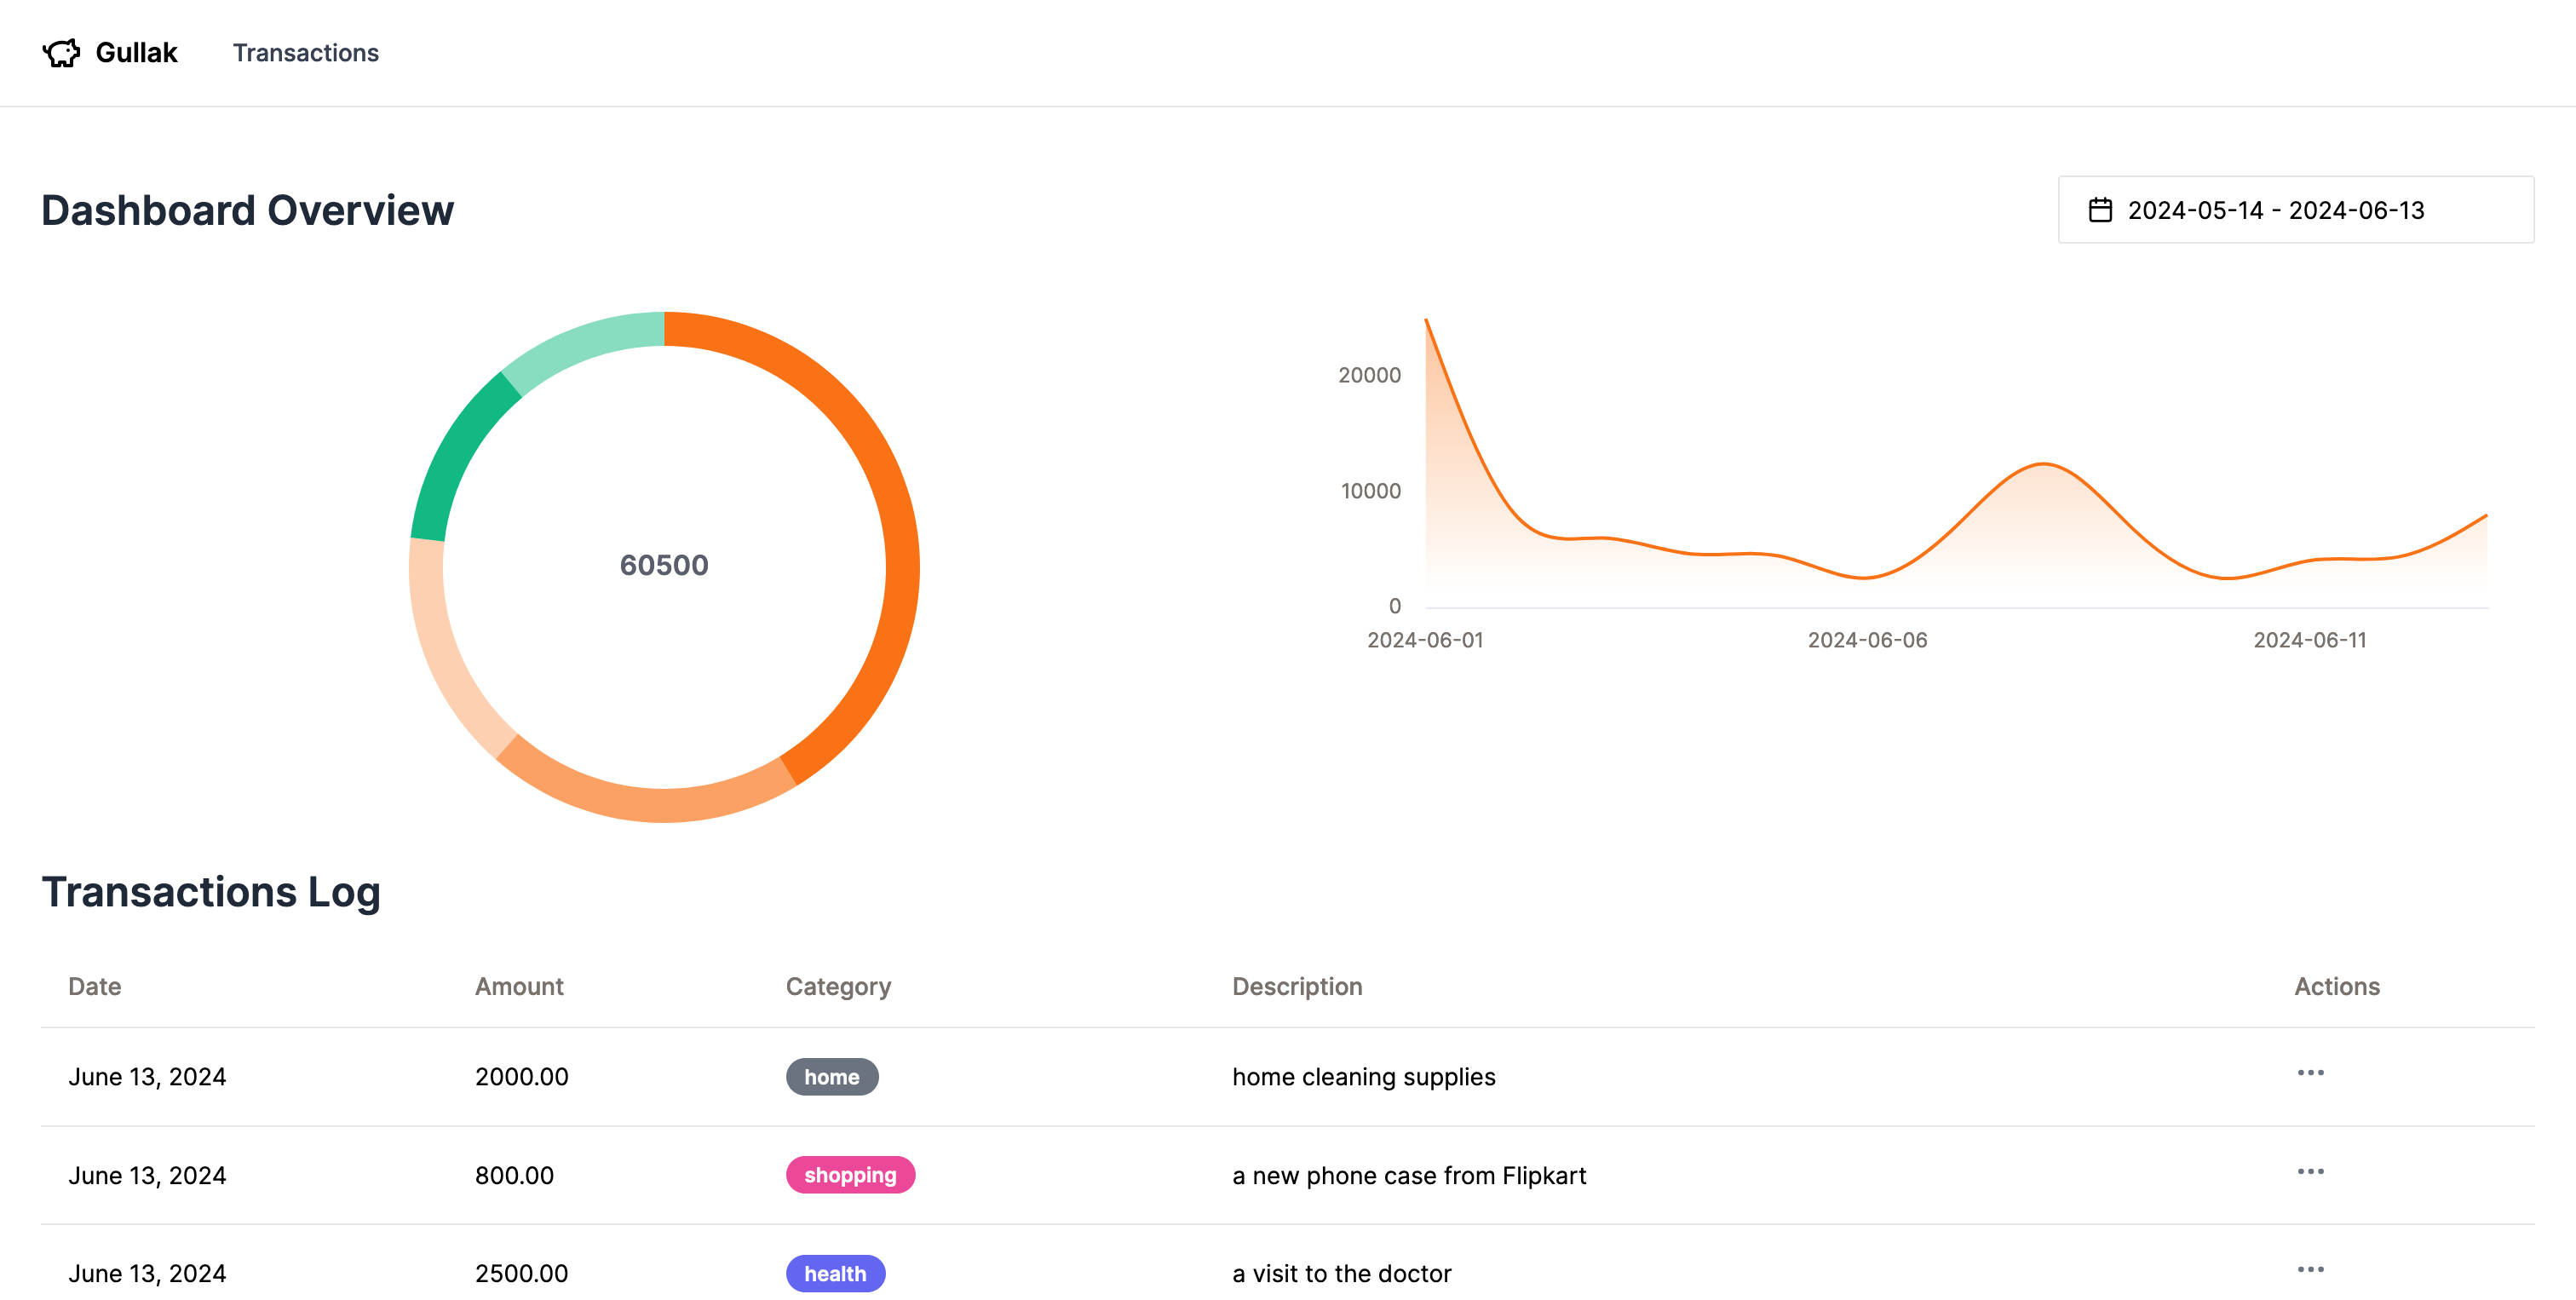
A couple of weeks ago, I decided to start logging and tracking my expenses. The goal was not to record every minor purchase but to gain a general insight into where my money was going. In this post, I’ll dive deep into the behind-the-scenes of building Gullak—an expense tracker app with a dash of AI (yes).
🔗Why
My wife and I have a simple system for tracking our expenses during trips: we use Apple Notes to maintain a day-wise record, jotting down a one-liner for each expense under the date. This straightforward method has proven effective in keeping tabs on our spending habits while traveling.
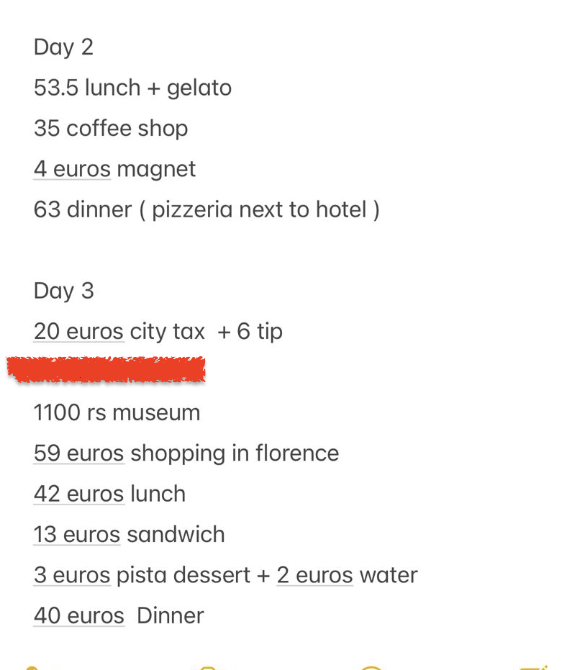
For instance, during our last Europe trip, we recorded our daily expenses. After returning home, I was eager to analyze our spending patterns. I copied all these items into Google Sheets to analyse the top categories that I spent on during the trip.

I decided to develop a simple expense tracker app that automatically categorizes expenses into various groups like food, travel, shopping, etc. I believed this was a practical use case for leveraging an LLM paired with Function calling to parse and categorize expenses.
🔗Initial Prototype
The first step involved designing a prompt to capture user input about their spending. I picked up go-openai library and experimented with it.
Almost a year ago, I had developed a small bot for personal use, which provided a JSON output detailing the macronutrients and calories in specific food items, storing this information in Metabase. However, this was during the early days of API access provided by OpenAI. Due to occasionally unsatisfactory and inconsistent responses (despite instructions like “MUST RETURN JSON OR 1000 CATS WILL D*E SOMEWHERE”), it wasn’t entirely reliable.
Function calling addresses two main limitations of traditional language model responses:
- Inconsistent response format: Without function calling, responses from language models can be unstructured and inconsistent, requiring complex validation and parsing logic on the application side.
- Lack of external data integration: Language models are typically limited to the knowledge they were trained on, making it challenging to provide answers based on real-time or external data.
It’s important to note that the LLM does not actually execute any functions. Rather, we create a structure for the LLM to follow in its responses. The LLM would then generate a response with the content as a stringified JSON object following the schema provided in the function definiton.
I created a function called categorize_expense. This function takes a list of transactions as parameters, with each transaction having properties like transaction_date, amount, category, and description.
Here’s what this looks like:
fnCategorizeExpenses := openai.FunctionDefinition{
  Name:        "categorize_expense",
  Description: "Categorize expenses from the given input.",
  Parameters: jsonschema.Definition{
    Type: jsonschema.Object,
    Properties: map[string]jsonschema.Definition{
      "transactions": {
        Type:        jsonschema.Array,
        Description: "List of items purchased",
        Items: &jsonschema.Definition{
          Type: jsonschema.Object,
          Properties: map[string]jsonschema.Definition{
            "transaction_date": {
              Type:        jsonschema.String,
              Description: "Date of transaction in ISO 8601 format (e.g., 2021-09-01) if specified else today's date.",
            },
            "amount": {
              Type:        jsonschema.Number,
              Description: "Amount of the item",
            },
            "category": {
              Type:        jsonschema.String,
              Description: "One word category of the expense (e.g., food, travel, entertainment)",
            },
            "description": {
              Type:        jsonschema.String,
              Description: "Concise and short description of the item",
            },
          },
          Required: []string{"transaction_date", "amount", "category", "description"},
        },
      },
    },
    Required: []string{"transactions"},
  },
}
The response from this API call can then be unmarshalled into a struct.
var transactions models.Transactions

if err := json.Unmarshal([]byte(toolCall.Function.Arguments), &transactions); err != nil {
    return err
}
The next step was to determine exactly how users would provide input. I considered various methods that would make entering expenses as straightforward as my approach with Apple Notes and decided to create a Telegram bot.
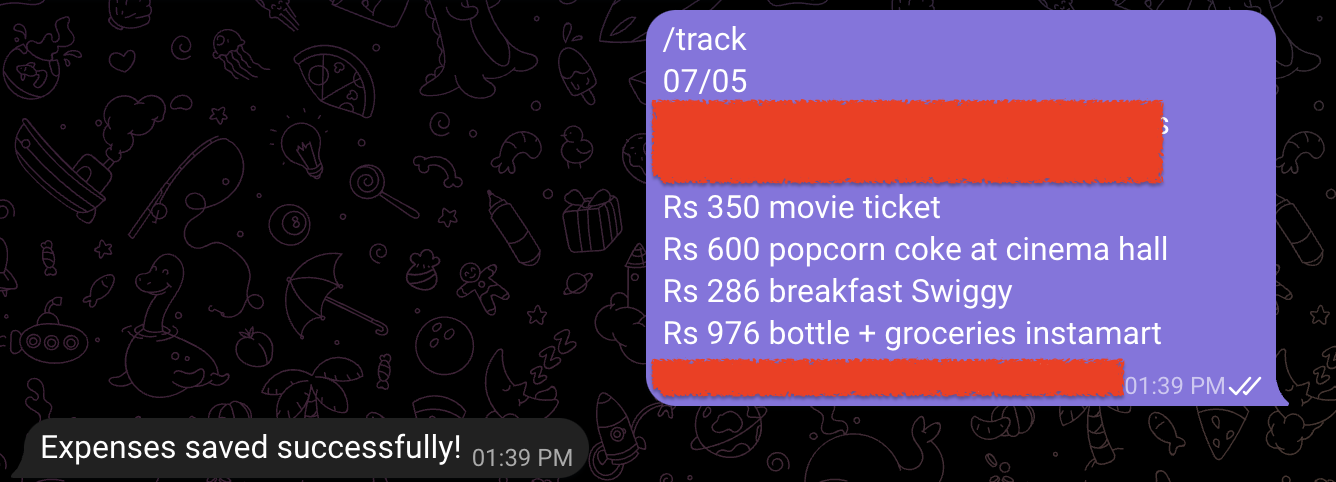
I developed a Telegram bot that would parse the expenses and save them to a SQLite database. I explored tools like evidence.dev, a nice platform for creating frontends using the database as the sole source of truth. However, I encountered an issue where it could not correctly parse date values (see GitHub issue). Ultimately, I returned to my reliable old friend—Metabase.
However, I faced two main challenges with this approach:
-
Privacy Concerns: Telegram does not offer the option to create a private bot; all bots generated through BotFather are public. To restrict access, I considered adding session tokens, but this approach was unsatisfactory. If I planned to distribute this bot, implementing a token-based, DIY authentication system on Telegram did not seem appropriate.
-
Fixing Bad Entries: To correct erroneous entries, I had to manually update the SQLite table. As I intended to share this bot with my wife, I needed a more user-friendly workflow. Manually raw dogging
UPDATESQL queries was not the most user-friendly solution.
After a day or two of experimenting, I decided to build a small frontend for now.
🔗Building Frontend
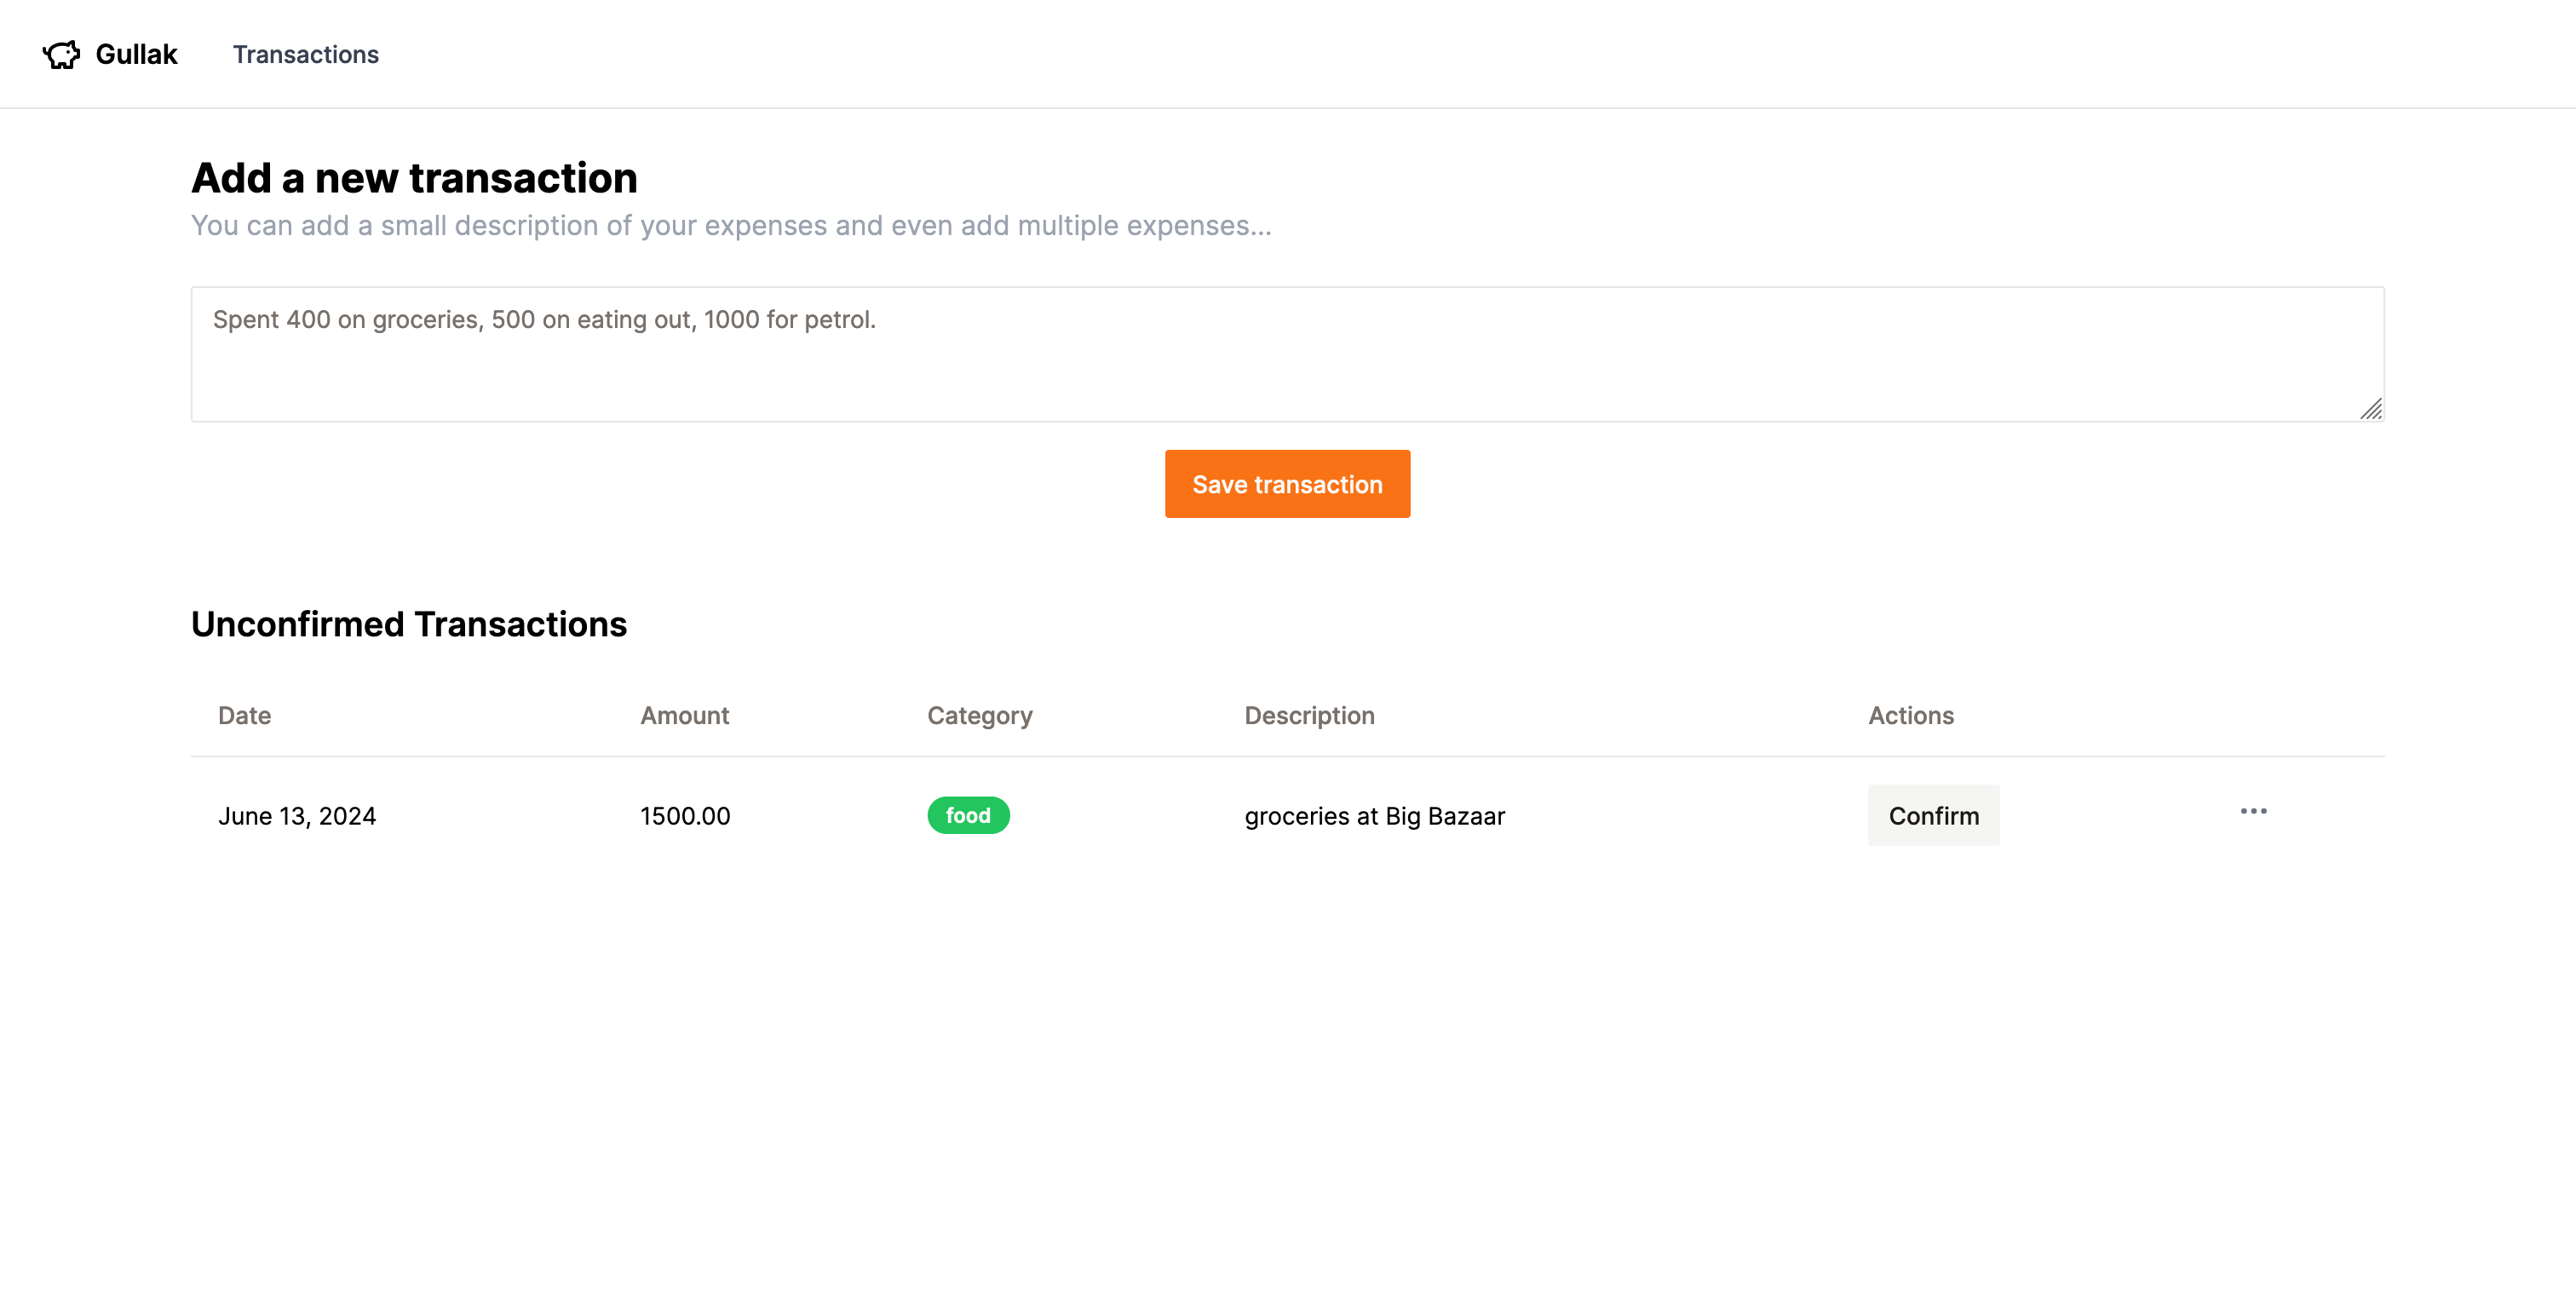
As a backend developer, my core expertise is NOT JavaScript, and I strongly dislike the JS ecosystem. Obviously there’s no dearth of choices when it comes to frameworks, however for this project I wanted to stay away from the hype and choose a stack that is simple to use and productive (for me) out of the box. Having used Vue.js in production in the past, I feel it ticks those boxes for me as it comes bundled with a router, store, and all the niceties, and it has excellent documentation. After reading a refresher on the new Vue3 composition API syntax, I hit the ground running.
I find Tailwind CSS ideal for someone like me who prefers not to write CSS or invent class names. It’s a heavily debated topic online, but it’s important to pick our battles. An issue I encountered while researching UI frameworks was that Vue.js seems to have fewer options compared to React, likely due to its lower popularity. After some google-fu, I discovered a promising project called shadcn-vue, an unofficial community led port of the shadcn/ui React library.
The cool thing about this library is that it doesn’t come bundled as a package, meaning there’s no way to install it as a dependency. Instead, it gets added directly to your source code, encouraging you to tweak it the way you like.
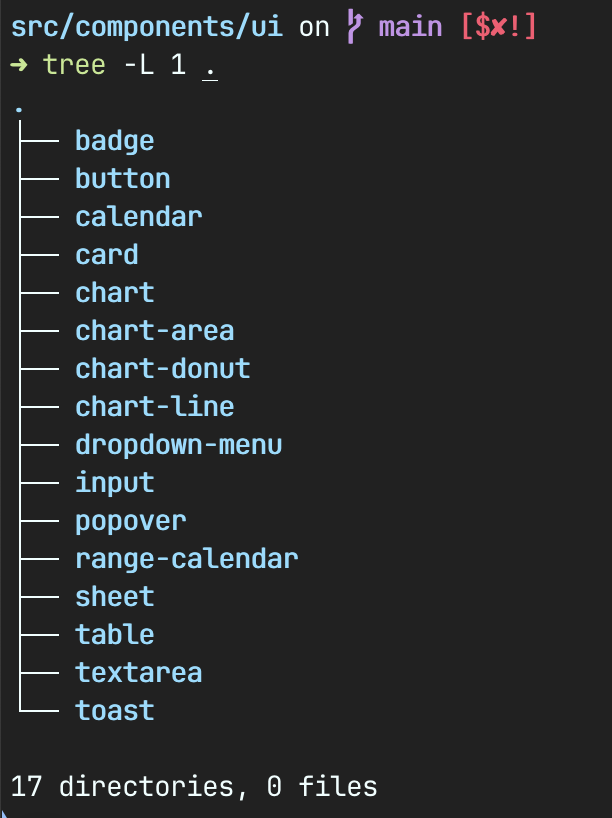
I believe it’s an excellent starting point for anyone looking to build their own design system from scratch, as it allows for customization of both appearance and behavior. It might have been overkill for my simple UI, but I thought, what the heck, if side projects aren’t for exploring new things, what’s the point of it all? 😄
🔗Database
For the database, I opted for SQLite. It’s perfect for a small project like this since the database is just a single file, making it easier to manage. Initially, I used the popular driver mattn/go-sqlite3, but I found that the CGO-free alternative modernc/sqlite works just as well.
I also experimented with sqlc for the first time. For those unfamiliar, sqlc generates type-safe Go code from your raw SQL queries. It handles all the boilerplate database code needed to retrieve results, scan them into a model, manage transactions, and more. sqlc makes it seem like you’re getting the best of both worlds (ORM + raw SQL).
Here’s an example query:
-- name: CreateTransaction :many
-- Inserts a new transaction into the database.
INSERT INTO transactions (created_at, transaction_date, amount, currency, category, description, confirm)
VALUES (?, ?, ?, ?, ?, ?, ?)
RETURNING *;
Using sqlc generate, it generates the following code:
// Code generated by sqlc. DO NOT EDIT.
// versions:
//   sqlc v1.26.0
// source: queries.sql

package db

import (
	"context"
	"database/sql"
	"time"
)

const createTransaction = `-- name: CreateTransaction :many
INSERT INTO transactions (created_at, transaction_date, amount, currency, category, description, confirm)
VALUES (?, ?, ?, ?, ?, ?, ?)
RETURNING id, created_at, transaction_date, currency, amount, category, description, confirm
`

type CreateTransactionParams struct {
	CreatedAt       time.Time `json:"created_at"`
	TransactionDate time.Time `json:"transaction_date"`
	Amount          float64   `json:"amount"`
	Currency        string    `json:"currency"`
	Category        string    `json:"category"`
	Description     string    `json:"description"`
	Confirm         bool      `json:"confirm"`
}

// Inserts a new transaction into the database.
func (q *Queries) CreateTransaction(ctx context.Context, arg CreateTransactionParams) ([]Transaction, error) {
	rows, err := q.query(ctx, q.createTransactionStmt, createTransaction,
		arg.CreatedAt,
		arg.TransactionDate,
		arg.Amount,
		arg.Currency,
		arg.Category,
		arg.Description,
		arg.Confirm,
	)
	if err != nil {
		return nil, err
	}
	defer rows.Close()
	items := []Transaction{}
	for rows.Next() {
		var i Transaction
		if err := rows.Scan(
			&i.ID,
			&i.CreatedAt,
			&i.TransactionDate,
			&i.Currency,
			&i.Amount,
			&i.Category,
			&i.Description,
			&i.Confirm,
		); err != nil {
			return nil, err
		}
		items = append(items, i)
	}
	if err := rows.Close(); err != nil {
		return nil, err
	}
	if err := rows.Err(); err != nil {
		return nil, err
	}
	return items, nil
}
🔗Apple Shortcuts
Similar to my Apple Notes approach, I wanted to create a shortcut that would allow me to log expenses quickly. I created a simple shortcut that would prompt me to enter the expenses and send an HTTP POST request to Gullak’s API server. I then open the dashboard once in a while to confirm/edit these unconfirmed transactions.
You can read more about setting up the Shortcut in your Apple devices here.
🔗Proudly, Not a Weekend Project
For every “I could do this in a weekend” comment, yes, this project is straightforward—a “CRUD GPT” wrapper that isn’t complicated to build. Yet, it took me over a month to develop. I spent less than an hour most days on this project, instead of cramming it into an all-nighter weekend project - an approach I want to move away from. Slow and steady efforts compound, outlasting quick, sporadic bursts. I’m pleased to balance this with my full-time job without burning out.
🔗Ideas for the Future
Initially, I didn’t set out to build a comprehensive budgeting app, just an expense logger, as that was my primary need. However, if usage increases and the tool proves helpful in reducing unnecessary spending, I’m open to adding more features. Some possibilities include a subscription tracker, integration with budgeting tools like YNAB or Actual through their APIs, and monthly reports sent via email. The best part is that you own complete data, as the data is stored locally on your device so you can also export it anytime and build other integrations on top of it.
Feel free to open a GitHub issue or reach out if you have any suggestions or feedback. I’m excited to see where this project goes!